Some of you may have noticed my new menu bar! There are three links so far. You can: go home, go right to a list of all my tutorials, and you can see a list of all my reviews. Instead of when you click on my labels and it just shows you the posts... this time I have created a list with a picture from each post so that you get a sneak peek. There is also a small description of each post. I hope this helps you to surf around My Passions for Fashions better! If you think I should have another link please tell me!
~~Ponytails

Tuesday, June 29, 2010
Friday, June 25, 2010
Terrific Thrifty Thursday #11
Welcome to the 11th edition of Terrific Thrifty Thursday! First up is this ruffly umbrella! This project is from Becky Waldrop and the tutorial is right at Dollar Store Crafts instead of them just linking to her project. Think about it, what is a standard raincoat made out of? Plastic. And buying a plastic table cloth to make ruffles out of? Smart thinking!

And second is this demin flower headband. This project is from Creations by Kara. This is so cute and this project is recycling old jeans! Cool!

Do you have an idea for a Terrific Thrifty Thursday? Then you can submit an easy cooking, frugal, accessory, clothing, tip, and/or craft related project to: mypassionsforfashions (at) yahoo (dot) ca And if you have been featured please grab one of my buttons for your blog!
~~Ponytails
Thursday, June 24, 2010
Art: How to Draw a Girl
This is a good way to draw if you are thinking up an idea for an outfit or you want to learn how to draw a girl! This kind of drawing really doesn't have a name because I have used a little bit of Manga I learned from a girl last year, my own ideas on how to draw, as well as some stuff from books! I have a really cool tip on drawing hair so it doesn't look like it is stuck to the girl's head, too!
To draw a girl you will need:
a sharp pencil
an eraser
some paper

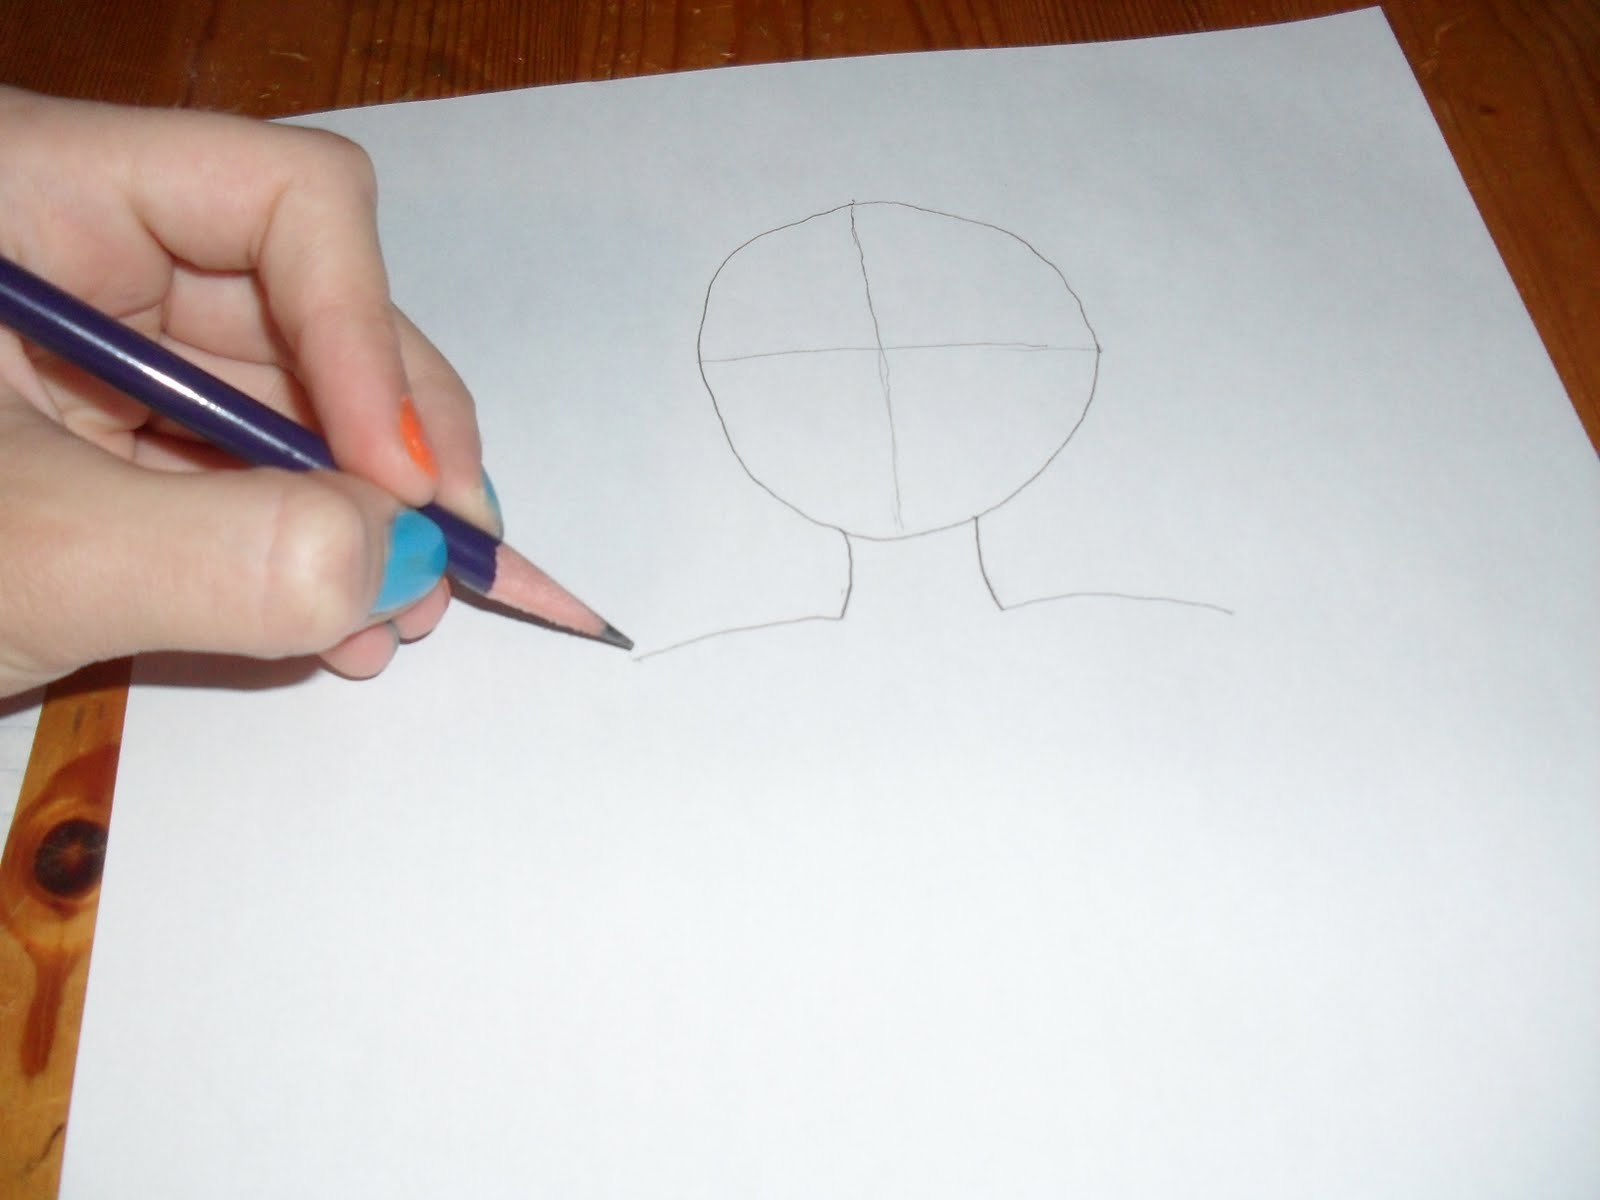
1. Lightly draw a cross near the top of your paper in the middle to leave room for the hair. Make the verticle line slightly longer then the other one.

2. Following the points of the cross make an oval around the cross.

3. At the bottom of the oval make a neck by curving two lines inwards.

4. Draw two curves coming out from the neck for shoulders.
5. Draw the neckline for the shirt (also used for a dress). A half circle, V, or square neck is fine, I'm using a V neck for this girl.

6. Now add any bling or jewelry to your girl that is going to be on the neck.

7. Now it's time to make the sleeves. Draw two sort of curved or straight lines across from the shoulders.

8. Now connect those lines to make sleeves.

9. Now make two long lines curving just a very little bit inwards coming down from the sleeves for the sides of the shirt (also used for a dress). Now connect those two lines for the bottom of your shirt. (if this is a dress skip connecting these lines.

10. Now for pants make two long lines coming down from the shirt and make them both like L shapes only the right leg is a backwards L this will be how long the pants will be. If you are making a dress or a skirt make these lines as long as you like for the length of the skirt or dress and instead of L shapes just connect the two lines straight across.

11. For pants now bring two lines back up the other side of the L shapes almost all the way.

12. Now make fashion belt or sash by drawing a line across the 'top' of the lines you just drew andand continuing it across (it's same for a skirt or dress. Just make a line straight across the skirt or dress where you want the sash or belt. Decorate the belt with stars, stripes, or whatever.


13. Now make some ankles or socks and make some shoes. For shoes, just experiment until you have what you like.

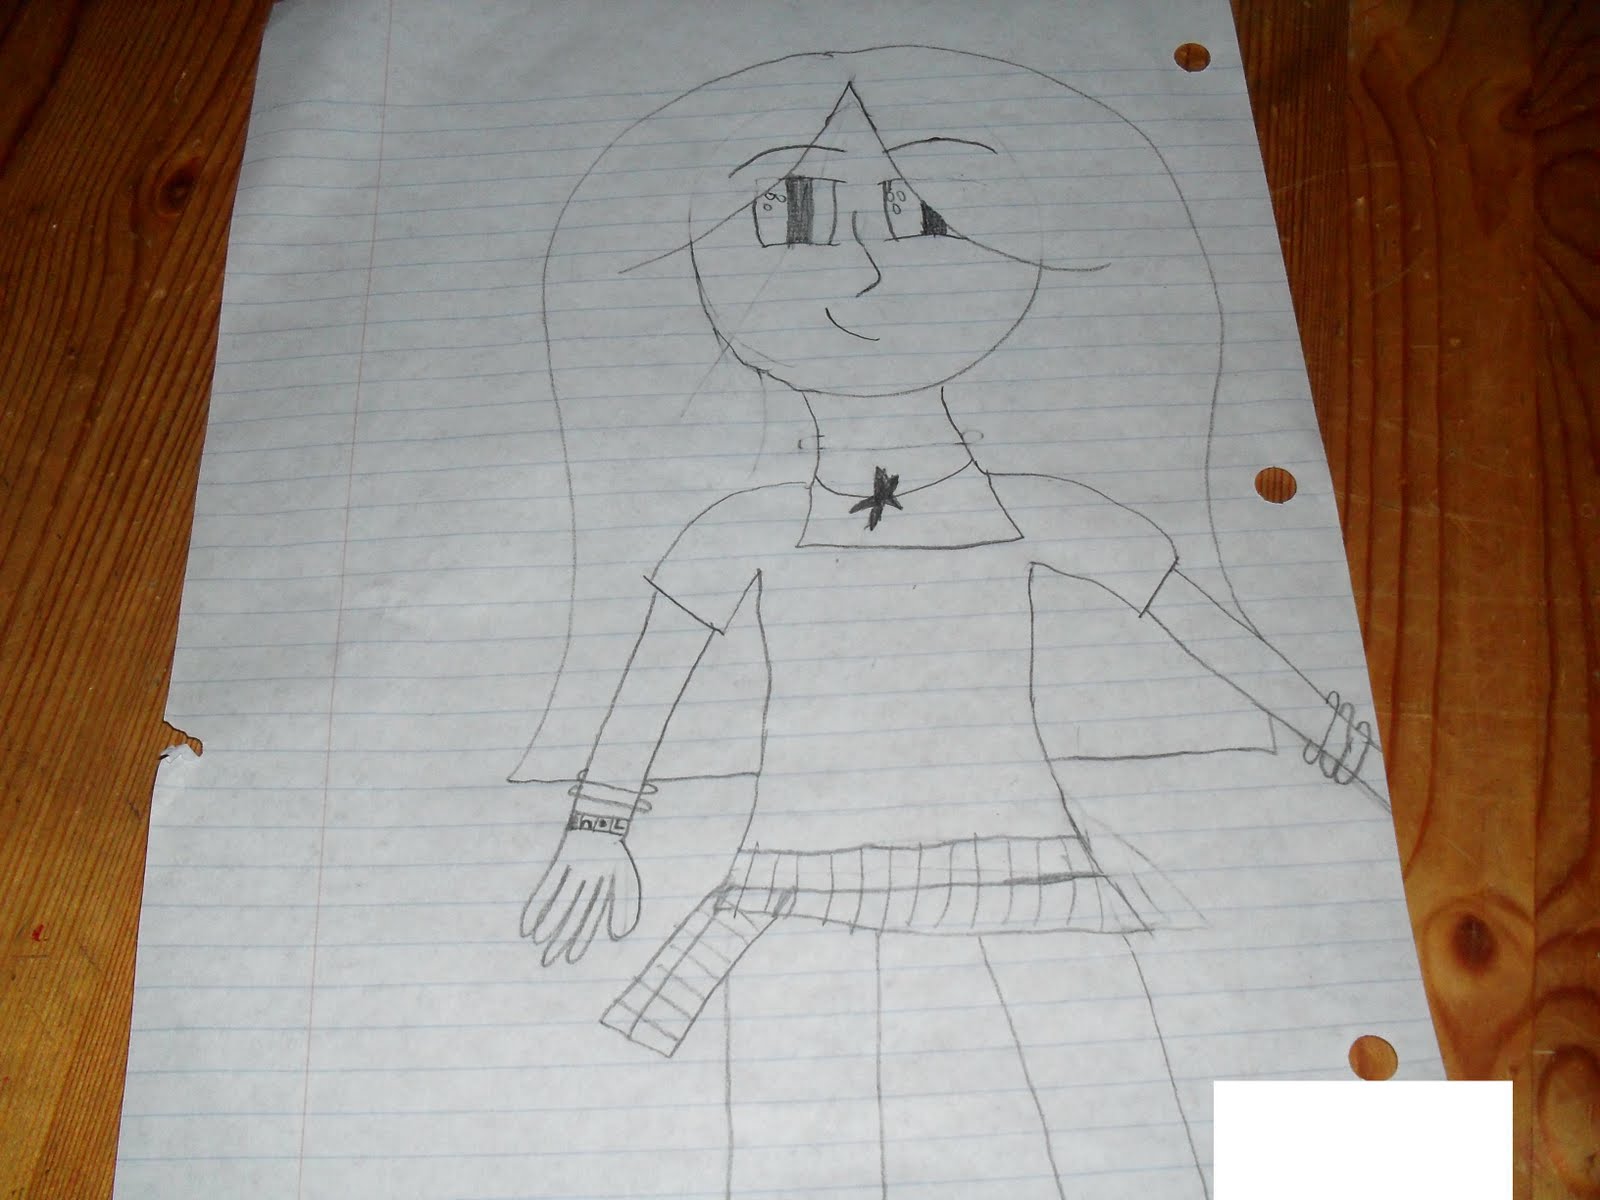
14. Now it's time to add some arms and hands. Draw two lines coming out of each sleeve for arms they should come down as far as the waist. For hands: look at your own hands, the thumb faces in towards your body, your middle finger is longest, the middle finger and index finger are about the same length, and your pinky is way shorter then the rest. You don't need to add knuckle lines though. I didn't draw the hands big enough on this girl, make sure your girl's hands aren't tiny.


15. Have you noticed something about your girl? She's bald! Time to add some hair. We are doing long hair today, so if you are having trouble making another style please leave it in the comments and I will make a post about it. Make a rainbow or upside down U over the girl's head,

then draw lines to make it look like it's behind her back,

and add a upside down curvy V.

Now the trick and tip: See how we're building out the hair from the head? This will make it look fuller and not stuck to the head. Simply erase where the top of the head is. Isn't that smart?

16. Now for the face. Draw to arcs over yes, over the hair for eyebrows,

draw two more arcs on the face, (I hid part of them with the hair, you don't have to.) draw two curved lines coming down from those arcs, and make two the same sized curved boxes. These are the eyes. Erase the cross on the face. Draw in pupils, they should reach from the tops to the bottoms of the eyes.


Following the line of the eyebrow and make a nose sort of a slightly curved line and a small nose at the end. Erase some of the nose so it doesn't look like it's coming out of the eyebrow. Add a smile and any extra accessories. And she's done! I hope you enjoyed this tutorial! If you are intrested in more drawing stuff e-mail me at: mypassionsforfashions (at) yahoo (dot) com

~~Ponytails
This tutorial is for personal use only. Copyright 2010 My Passions for Fashions
Sunday, June 20, 2010

Thursday, June 17, 2010
Terrific Thrifty Thursday #10
Welcome to Terrific Thrifty Thursday! Wow, the 10th already! For the 10th I am going to feature 3 projects instead! First up are these wire basket lanterns. When I saw these on Dollar store Crafts they said they would look nice in a tween's room and I agree! This project is from Crafting Occurs.

Second is this cool idea for a shower ring bracelet! This idea is so smart! It costs very little or nothing if you have a clear shower ring. This project is from Stepping Thru Crazy.

The last project is also from Stepping Thru Crazy. There are some good ideas over there, you should check it out. This project made me think why I had not thought of this! This is so smart! Personalize tank tops with those little sponge capsules from the Dollar Store!

Do you have an idea for a Terrific Thrifty Thursday? Then you can submit an easy cooking, frugal, accessory, clothing, tip, and/or craft related project to: mypassionsforfashions (at) yahoo (dot) ca And if you have been featured please grab one of my buttons for your blog!
Monday, June 14, 2010
Sewing Tip: How to Tie a Knot

I recently found this tutorial for how to tie a knot at the end of your thread when you are sewing! Now, I know how to make knots at the end of my thread but this method makes it a whole lot easier than trying to tie a knot over and over at the end of your thread in the same place so it's big enough, trust me!
~~Ponytails
Friday, June 11, 2010
Hello Kitty Headband


(Image on left from: Salty Pineapple)
I found a really good tutorial from this great blog called Salty Pineapple. The tutorial I am featuring today is for a Hello Kitty Headband! I made one and it is so cute and it is really simple to make. Nikki, from Salty Pineapple used hard headbands to make them but I had bought a pack of stretchy elastic headbands awhile back that I barely wear so this was a great way to transform one into a special headband! The pack I had bought had 6 colours in two different styles per colour(thin ones without flowers and thick ones with flowers)so they were a really good deal! Here's what they look like:

There are lots of colour options to chose from! You can match the felt and headband colour like Nikki or make a colour combination, like me! I decided to go with a thin pink headband with a yellow bow. Here are the results from the headband:


This got me thinking, "Who else wears a bow?"
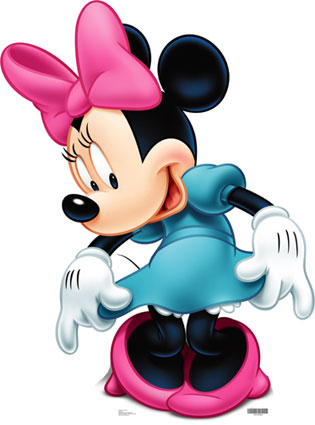
Minnie Mouse!
I doubled the size of the bow and instead of hot gluing it to the headband I just sewed it to headband to see if that would work too. You can also hot glue it. This would be great for a Halloween costume!


I know the Minnie Mouse one looks a little bit dorky otherwise and I would probably NOT recomend wearing it in a place with lots of other people, like the mall. Because you would probably get some funny looks! :P
I really like my new Hello Kitty headband! If you guys want more hair accessory projects please let me know! ~~Ponytails

Thursday, June 10, 2010
Terrific Thrifty Thursday #9
Welcome to the 9th edition of Terrific Thrifty Thursday! First up, this really cool(no pun intended) popcicle hair clip! This project was made by Kara from Sew Hip Mama! This is so cute! I would definitly make this if you had someone in your family who loved popcicles!

And second, this super easy zipper and knot headband! This project was made by Allison at How Does She? I like the idea of making knots and then cutting them of and gluing them on the headband! And headbands in packs of six can be found at the dollar store! You can also buy a scarf from the dollar store and use that for the knot part! The knots look like little rosettes!

That's it for this Terrific Thrifty Thursday! Do you have an idea for a Terrific Thrifty Thursday? Then you can submit an easy cooking, frugal, accessory, clothing, tip, and/or craft related project to: mypassionsforfashions (at) yahoo (dot) ca And if you have been featured please grab one of my buttons for your blog!
~~Ponytails
Tuesday, June 8, 2010
My New Blog Banner!
Hello!
You might have noticed that I changed my blog banner from the picture of flowers that I took to a new banner! What do you think? Should I go back to a picture of flowers or should this new banner stay? OR should I make a collage of all the projects I've made? Sort of like the banner on Obsessively Stitching's blog. I think this new banner is pretty! Tomorrow I will posting about a very cute headband! Stick around!
~Ponytails
Thursday, June 3, 2010
Review: Sally Hansen Xtreme Wear Nail Color
 Disclaimer: I bought these nail polishes with my own money and was not asked by Sally Hansen to do this review. Hello! Here is the review I promised! The nail polish is: Sally Hansen Hard As Nails Xtreme Wear Nail Color. I first used it at this B.U.Girl party where we painted our nails all different colours and one brand I used was this one.
Then 2 weeks ago my older sister told me that all Rexall store's nail polish was 50% off that week. So on Tuesday that week I went to Pharma Plus and picked up two bottles. The recipt said: YOU SAVED $3.00!!! Without tax they were $1.49 a bottle and with tax that came to: $3.37 for two bottles! That's two for one! Good nail polish prices are hard to find so this was a great deal! The 2 colours I got were Sun Kissed and Blue Me Away! I used Star Nail International Ridge Filler underneath(it helps the nail polish to go on smoothly), one coat of the nail polish, and a clear coat on top. Here are the pros and cons.
 Pros:
Pros:-The colours are really really pretty
-The price isn't that bad
-The bottles are pretty(the bottle caps were actually different on the 2 bottles and that's strange)
-The colours go on your nails the same colour as you see through the bottle(some nail polishs don't)
Cons:
- The actual nail polish is way to watery
 The actual nail polish is way to watery
-When I was at the girl party and I took it off after a week or two and the blue(I tried the blue there) stained my nails a bit

It's a pretty good nail polish except it is way to watery and harder to apply to smaller nails because of that. The colors are really pretty and I'm finding it on sale a lot at Pharma Plus. When I tried it at B.U.Girls it was a lot easier to apply and I think that's because it was older! So there's the review! I hope this was helpful! Don't forget to vote on my poll!
~~Ponytails
Subscribe to:
Posts (Atom)